Brake replacement - discs, pads, painting of calipers
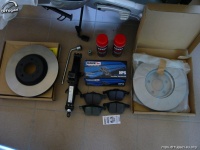
Due to the fact that the discs and pads on my Mazda was not in good condition, I decided to replace the entire set of brakes and the opportunity to paint calipers. Because I do not know any garage that would do it properly and comprehensively for reasonable money, I decided to do it by myself. After consulting with other MPS owners I bought Hawk HPS pads kit and OEM discs (the same as Mazda's authorized service use). I used paint in spray, which I bought in the paint store, said to be tested and resistant to temperature.
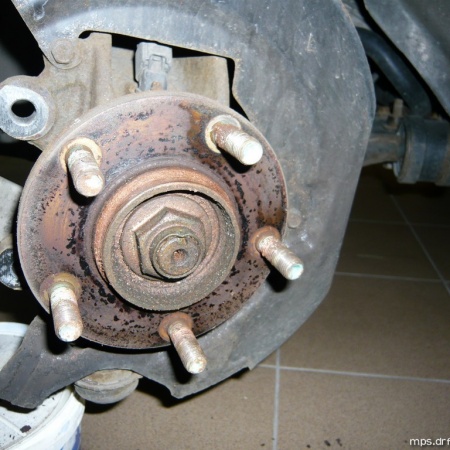
I started job on Saturday morning, after a while my brother came to help me. We removed the front wheels, discs and calipers and prepared it for painting. The paint dries longer than we expected, so we decided to do rear axle, and mount this all together on the next day. I decided to document the whole job on pictures, so there are about 60 pictures in gallery. This is photos of whole process of disassembly, preparation, painting and installation of discs, pads, calipers and wheels.
Materials and tools:
- OEM brake discs
- Hawk HPS brake pads
- Eco Color Brake Caliper paint (spray)
- solvents (general purpose and petroleum)
- wheel brace
- lift
- spanners and wrenches (especially 14, 17, 22) and torx (10?), mallet rubber or hammer
- pliers, special spanner to rear pistons or something in place
- bricks to support car when lifted
- wire brush
- abrasive paper
- grease resistant to temperature (included with pads) and/or graphite lubricant
- paper tape and foil to secure elements before painting
- paper, newspapers and rags
Hints:
- if you plan to paint all calipers it is best to organize yourself the blocks or bricks to support axes when you lift up the car, dismount all calipers at once, prepare, paint and leave them for at least one night to dry
- if you do not have a special tool to press piston, you can use pliers with thinner ends or other tool, you need to press piston and rotate it clockwise simultaneously
- you can facilitate your work, when you properly turn the wheels on front axle
Steps for work (for one wheel):
- unlock the bolts on the wheel
- lift up the wheel (raise the jack)
- unscrew the bolts and remove the wheel
- unscrew and remove caliper (front 17, rear 14), or remove part of caliper with torx (in front)
- prepare to caliper painting, clean with wire brush and abrasive paper
- degrease caliper with solvents
- secure active surfaces (slideways, contacts) with paper tape
- secure other not painted areas with foil
- degrease painted surfaces with nitro solvent
- paint calipers
- remove disc (with mallet rubber or hammer)
- clean the elements (wire brush, abresive paper, solvent), prepare to mount
- retractation of pistons in calipers: front - pressing on piston, rear - press and rotate clockwise (it is difficult without special tool)
- lubricate slideways and pistons on such surfaces which has a contact with brake pads with special grease (included with pads)
- place new brake pads in caliper
- place disc on pins and hold with bolts
- mount caliper or one part of caliper on front axe (you can do this in two steps - look at photo)
- screw caliper with screws (front 17, rear 14) or screw second part of front caliper with torx
- mount tension spring (rear)
- mount the wheel and screw the bolts
- lower the jack and tighten the bolts
NOTICE: When you finish work, when you have mounted discs, pads, calipers and wheels, but BEFORE you leave your garage, you have to push break pedal few times to pump up brake fluid to brake system. On the beginning brakes can have poor performance, because new pads needs to fit with new discs. It is best to drive one round nearby, go back to garage and tighten the bolts once again. Good luck!
